As I stated yesterday, here are the pictures and a description of my process in flipping Section 1 over on my main puzzling board so that contact paper can be attached to the back.
STEP 1: Take a picture of the completed puzzle section – just in case you never see it this way again! LOL (Just kidding!!!)
STEP 2: Carefully decide where you are going to make your cut. I wanted to use the repeat pattern borders as my cut line, but unfortunately the size foam board I purchased was a little too short to accomodate it so I had to improvise and make more, smaller sections instead, but it worked out fine.
STEP 3: Once I decided where to cut, I started taking out the pieces in that row and re-assembling them on the foam board where I would later slide the “cut out” mini section. After I took out the row of pieces from the section I wanted to separate, both horizontally and vertically, I was easily able to pull the cut section away from the remainder of the puzzle and then slide it off onto the foam board. Once the section was slid onto the foam board, I put the initial pieces I pulled from the section to remove it from the rest of the puzzle back where they went on the removed mini section.
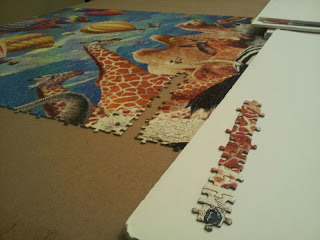
Below are two pictures of the removed sections on the foam board. As you can see in the bottom picture, I took too large a section of the animals and tried sliding it off onto the foam board. Because the size of my mini section was almost the same size as the foam board, it was much more difficult to slide it off without destroying any of the pieces. Lesson learned, always make your mini sections are quite a bit smaller than the size of your foam board….it’s much easier to manuever that way.
STEP 4: After the entire puzzle was cut up and moved onto foam board pieces, I labeled each foam board with a letter (A, B, etc) in the order of which it needed to be in once flipped. I knew I had to do this because otherwise I might flip a section over and not know where it went since I wouldn’t be able to see any of the picture on the front side. And I certainly didn’t want to put contact paper on the back of the whole thing, flip it back over, and discover that some animal’s head was now the bottom part of a hot air balloon. LOL
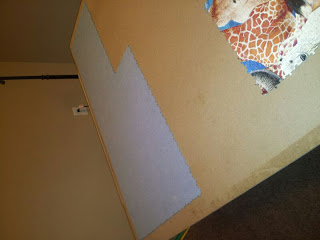
STEP 5: For the flippng process, I took the last piece of foam board and put it over top of my “A” board, sandwiching the mini section between the two pieces of foam board. I then put 4 small strips on tape on each side of the board sealing them together so nothing would accidentally fall out. (I later on stopped taping as the foam boards stayed together well enough and the flipping only took a few seconds.) Once the section was flipped, I removed the tape and took the top piece of foam board off. Now I had my first section flipped over, and ready to put back on the main puzzling board. I easily slid it off and placed it in it’s new, temporary home. Here’s a picture of several sections flipped and placed on the puzzle board backside up.
The only thing you need to be prepared for is fastening each section back together again once it’s flipped. The sections are not easy to lift and move once they are laying flat on the puzzle board, so make sure when you are sliding the section off the foam board that you try and line it up so that the new section overlaps just a tiny touch on where it’s going to join the previous section. This way, when you are reconnecting you can actually slide the new section in a downward slant to re-connect it to the previous section. This makes it very easy to “sew” the pieces back together as opposed to having to lift the section upwards to get it in the right position to reconnect. (Hopefully that made sense….it’s really easy to see when you’re looking at it, but difficult to describe.)
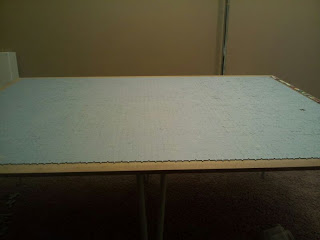
Here’s the whole section flipped over on the puzzle board and ready for contact paper.
STEP 6: Carefully apply contact paper to the back of the entire section so that it can be removed from the puzzling board in one large piece without falling apart. This is the step I’m about to tackle this afternoon. I will post more later today once I see how this goes. Wish me luck!
One thought on “Section 1 – Disassembled and Reassembled”
Sounds like you have a good plan for flipping it. Seems like the way I would do it too.
Do you have a wall in your house big enough for the puzzle when it's done? I have….the ceiling! LOL The basement would be the only place, but I really don't want it down there. It's slightly damp and too out of the way. I want it as a conversation piece. 🙂